Bow And Arrow Choke: BJJ Submission Explained

Out of all of the collar chokes in Jiu Jitsu, the bow and arrow choke is among the strongest one. The angle you take when locking it creates immense pressure on your opponent’s neck.
This is why the bow and arrow is one of the most popular choke in Gi Jiu Jitsu. Let’s take a deeper look at this submission and tell you everything about the bow and arrow choke.
Listing where it was created , how it works, and giving important details for how to finish the move.

Who created the bow and arrow choke?
This choke was originally created within Judo as part of the “ne-waza”(ground techniques). In Judo, all collar chokes are referred to as “Okuri-Eri-Jimi.”
When Jiu Jitsu was developed, practitioners of the martial art began innovating and improving upon the choke. In (Brazilian) Portuguese, they refer to the move as the berimbau and in English, we know it as the bow and arrow choke.
How does the bow and arrow choke work?
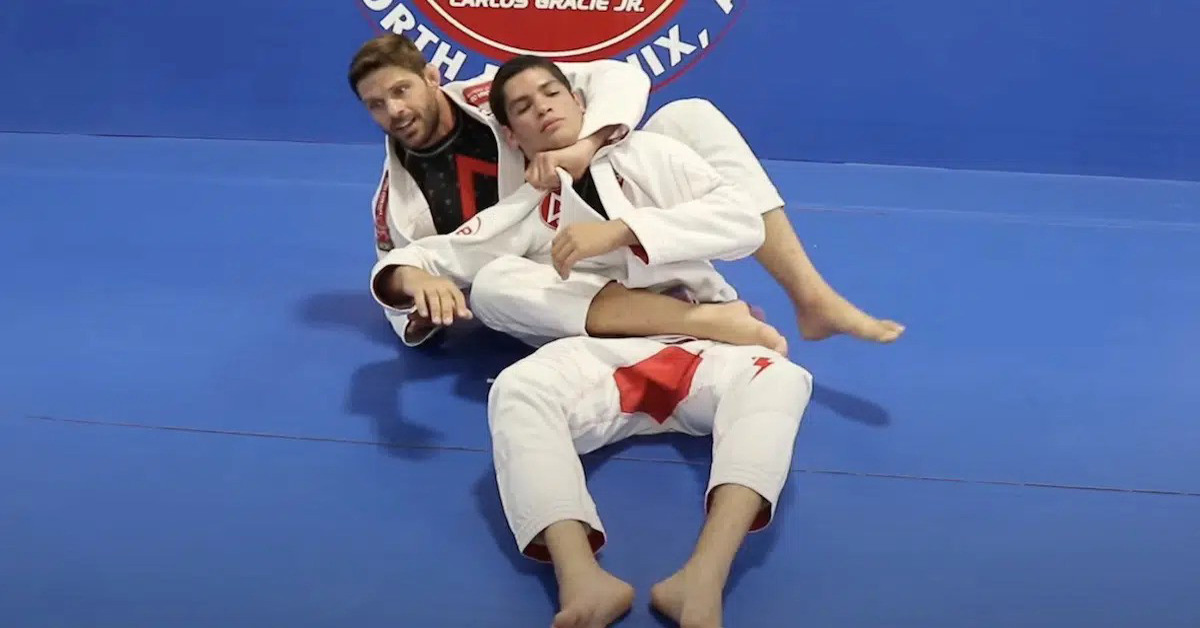
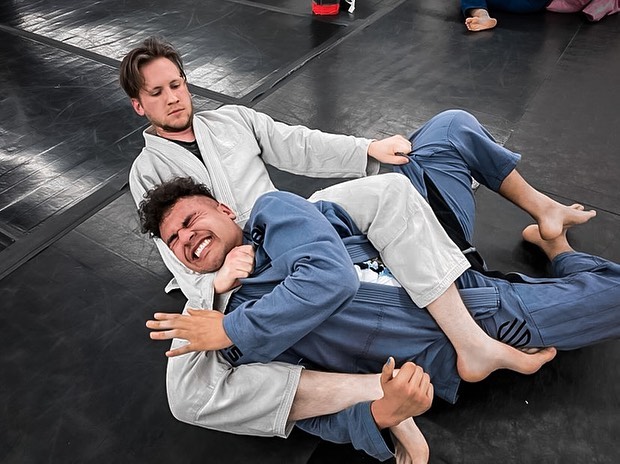
This choke functions with a mix of leverage and a solid grip on the opponent’s collar. Once you grab a hold of your opponent’s collar, you then slightly turn your body towards their leg.
Grabbing their leg and pulling it towards you as you pull away on the collar. These two movements together exactly mimics the movement of pulling back on a bow and shooting an arrow.
The leverage you get from putting these two movements together creates one of the tightest chokes in BJJ.
Basic collar choke
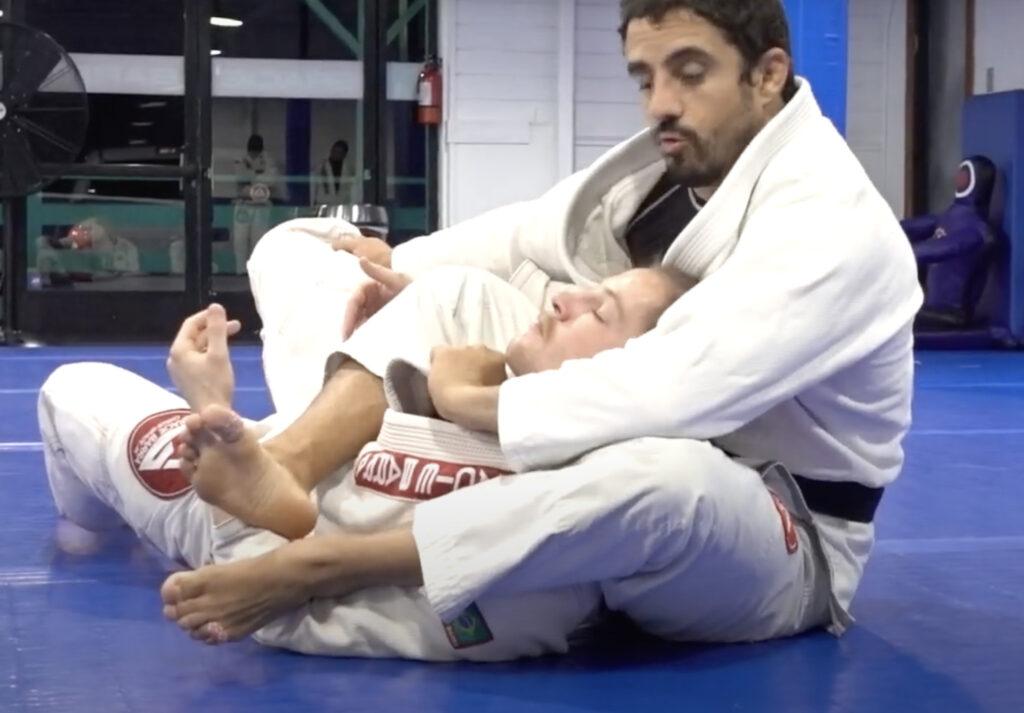
Before we break down the bow and arrow choke, you must understand the basic collar choke from the back mount. You’ve already secured your opponent’s back, so all you need to do is get your choke grips.
Start with a seatbelt grip with your hands clasped together. Take your bottom hand and pass your opponent’s same side collar to our other hand.
With your top hand securing your top grip, reach for the far collar right under your top grip. Then in one motion, pull up on your top grip as you pull down on your bottom grip.
Be sure to fall on the opposite shoulder of your choke arm to get the most pressure on your bow and arrow choke.
Bow and arrow choke from back mount
The first place you learn the bow and arrow choke from is the back mount. Before we get into the steps of the choke, you have to control the back mount a certain way.
You need a little space between you and your opponent, so you have the room to rotate on the choke. Keep the back control with a seatbelt grip to keep your opponent in place.
Next, pass the far collar to your top hand. Then with your collar grip set, reach down with your bottom hand and grab your opponent’s leg. Be sure to hold the leg and not just the pants to really secure the leg.
Use that leg control to rotate your body in between your opponent’s head and leg. Now that you have the angle, pull the collar away and hold their leg into you to set in the choke.
Bow and arrow choke from turtle position
The other most common position to hit the bow and arrow choke is when your opponent is in the turtle position. They’re blocking you from taking their back, but are open to a variety of chokes including the bow and arrow.
Keep your chest right on your opponent’s back to keep them in place as you work for your grips. Pass your hand under your opponent’s far arm to grab hold of their collar.
Then pass that collar up to your top hand. From there, you’re going to slightly raise up and move your outside leg around your opponent’s legs to get your hook.
In one quick motion, you hook, grab hold of your opponent’s leg and roll forward. This is a really dynamic movement you have to do fast.
As you roll forward, you end up right in the finishing position of your bow and arrow choke.
Bow and arrow setup from mount

There’s actually a really slick transition from the mount to the bow and arrow choke. From the mount, start like you’re going for a cross collar choke and grab a deep palm up collar grip.
Instead of putting on your other grip, you use this collar grip to pull your opponent on their side. Once your opponent is on their side, switch your collar grip to your outside hand.
From there, just go into your finishing sequence of the bow and arrow choke.
Bow and arrow from side control
From side control, you can set up a really tight bow and arrow from this position. Start by taking your hand under your opponent’s neck and reach around to grab your opponent’s collar.
After grabbing their collar, be sure to close your elbow to prevent them from ducking under to escape.
Once you’ve established your grip, step over your opponent’s body and go to the mount position. Then immediately grab hold of their leg and fall back into your bow and arrow choke.
Bow and arrow choke finishes
There are a few different ways you can finish the bow and arrow choke depending on the situation. Here are the details for those finishes.
Traditional finish
The traditional bow and arrow finish involves crossing your feet over your opponent’s far shoulder. It sort of looks like a pseudo crucifix that traps your opponent’s arm. Preventing them from defending your choke by sitting up and pulling off your grips.
Shin behind the head
The shin behind the head finish is a possibility when your opponent is blocking you from trapping their shoulder. When this happens, slide your outside leg behind your opponent’s head. Then pull back on your collar grip as you drive your shin into their neck to finish the choke.
Wrist trap finish
Sometime before you can trap your opponent’s arm, they bring their hand up and try to pull off your grip. If this happens, you still bring your legs over, but this time you trap their wrist.
It is basically the same finish as the traditional one. Just trapping your opponent’s wrist instead.
Far leg behind the head
There are other times when you can’t finish the choke, because you can’t trap your opponent’s shoulder. They either have good defense or broad shoulders.
When this happens take your inside leg and bring it over your opponent’s body and behind their head. Curl your leg down to complete this bow and arrow finish.
Tips for doing the bow and arrow choke
The bow and arrow choke can be the most powerful choke in your submission game. You just have to remember the steps and here are the most important tips for doing this move.
- Collar grip: This submission starts with a solid collar grip. Without this collar grip, you have no choke.
- Space between your opponent: Be sure to have a small amount of space between you and your opponent before going for the bow and arrow. When you’re really tight on your opponent it makes it harder to rotate or get the angle on your opponent.
- Rotate your body: Once you get your collar grip, you need to start rotating your body towards your opponent’s body. Look to get yourself right in between their head and leg for the best angle for the submission.
- Grab the leg: After rotating your body, you need to get a hold of your opponent’s leg. Holding their leg keeps them from being able to defend by turning away
- Trap the arm: To keep your opponent from blocking your choke grip try to trap their arm with your leg. This will keep them from turning into you and attempt to break your collar grip.
- Pull in/pull out: For the finish, pull the opponent’s leg into you as pull their collar away from you.


