Arm Triangle Choke

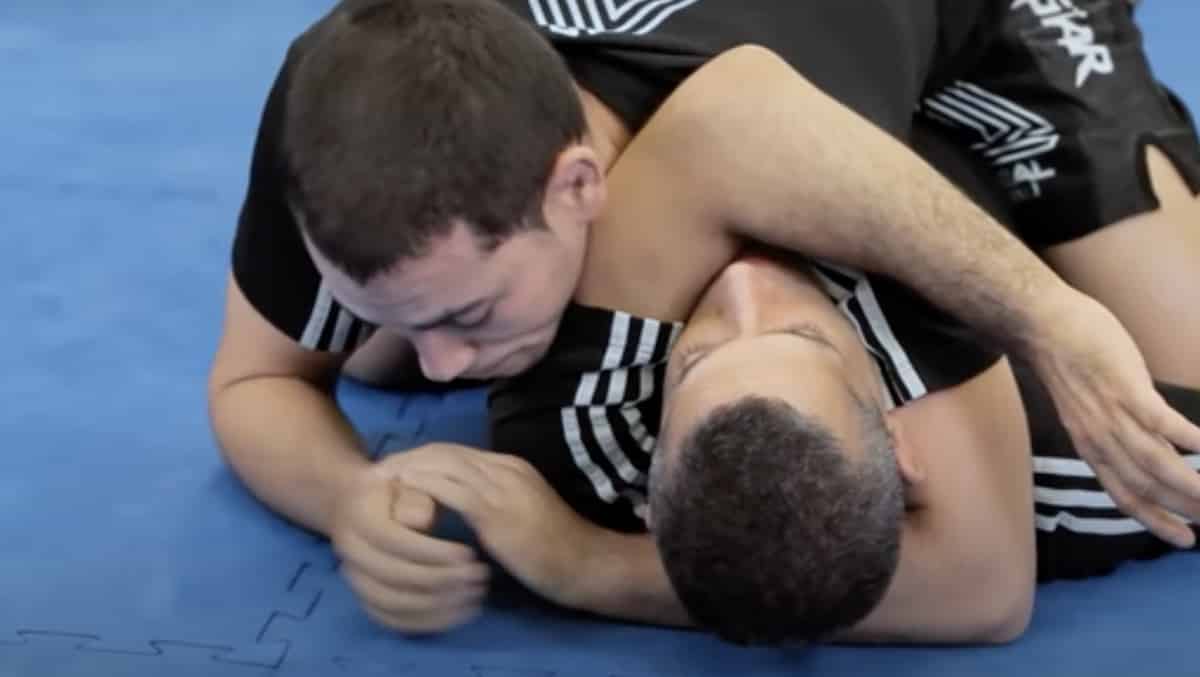
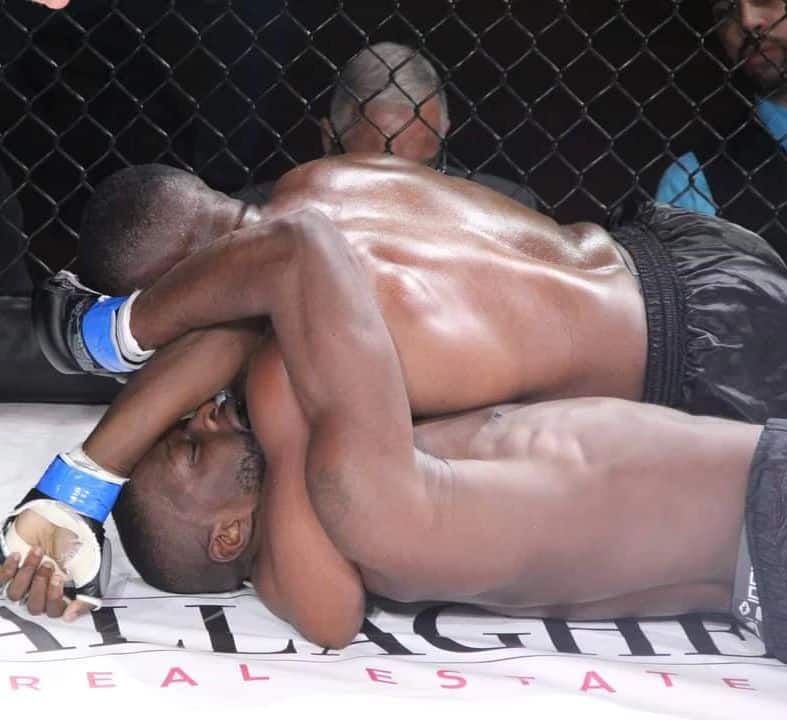
One of the favorite chokes of grapplers that love laying down heavy top pressure is the arm triangle choke. When done correctly it is one of the strongest and most secure chokes in all of Jiu Jitsu and MMA.
The best part is it doesn’t require a whole lot of strength to get a powerful squeeze on your opponent. Here is everything you need to know about the arm triangle choke.
We’ll go into its history, how it works, and list different entries into the choke. Then we’ll give you important tips for getting the most out of your triangle choke.

Who created the arm triangle?
Jiu Jitsu adopted the arm triangle choke from Judo, but the move has most likely been around long before Judo. Within Judo, the submission is referred to as the “Kata-Gatame.”
In Portuguese, the arm triangle choke is known as the triângulo de braço. For all variations of the arm triangle choke, Brazilian Jiu Jitsu practitioners use this name.
Later on once American wrestlers began learning Jiu Jitsu, they really took a liking to the arm triangle. Since they were already keen on laying down heavy top pressure, the arm triangle was perfect for them.
Today, the arm triangle is taught throughout all forms of grappling and a must know submission.
How does the arm triangle work?
How the arm triangle choke works is just a mix of leverage and a little force. When you wrap your choke hand under your opponent’s neck, you’re also driving their shoulder into their own neck.
Doing this cuts off the blood to their head and basically makes them choke themselves. Then as you drive yourself down on your opponent’s neck, you pull your arms inward and drop flat to the mat.
Squeezing your opponent’s neck using your whole body just like a snake constricting its prey.
Arm triangle from mount
One of the first positions you learn the arm triangle choke from is the mount position. Your opponent’s arms are already in to defend against armbars.
From here, push your opponent’s elbow at the same time you wrap your arm around their neck. Once you get your arm behind their neck, quickly drop your head to the ground and get your grips.
The best grip to use for the arm triangle is a palm on palm Gable grip. If you prefer to use an RNC bicep grip that will also work.
Once your grip is set, transition your body to side control. Be sure to go to the side of the arm you have trapped.
Before you sink in your choke, you need to remember your head placement. Make sure you’re ear to ear with your opponent and your forehead is on the ground. You will also need to slightly walk your body out and stay flat, so your opponent doesn’t recover half guard.
Now to finish the choke, slowly use your whole body and put on the pressure.
Arm triangle side control
You can set up an easy arm triangle from on top in side-control. The opportunity opens whenever your opponent is defending by framing on your neck to make space to escape.
Whenever they do this, you start the set by driving your shoulder into your opponent’s chin. This forces them to turn their head, which makes it harder for them to defend.
Then with your arm behind their neck, reach towards their far arm and either try to grab their armpit or shoulder. Doing this keeps your opponent close to you as you control their hip with your other arm.
While you’re controlling their head and far hip, attach your thigh to their inner hip. Attaching your thigh to their near hip makes it harder for them to recover half guard.
Next, continue to put down serious pressure to make your opponent push back. When they push back, palm their elbow to push their arm up as you drop your head under the arm.
Before you set in your grip you need to transition to the other side control. Drop your forehead to the mat going ear to ear as you use your knee to slide across their body.
Get your grip and squeeze with your body for the finish.
One armed arm triangle choke
Believe it or not, you can actually finish the arm triangle choke with just one arm. You can start this set up from side control.
Your arm hooking under your opponent’s head needs to be deep aiming to grab their far armpit. Once you get this grip, you need to use it to pull your opponent into you.
The next step with this setup is your head positioning. Drop your head under your opponent’s arm and aim to press your head against their rear delt. Doing this makes sure that you drive your opponent’s arm into their neck.
Then with your grip and head placement set, lay down heavy shoulder pressure on your opponent’s neck. This heavy pressure makes your opponent more prone.
Next with your opponent under control, slide your knee across their stomach and transition to the other side. For the finish, base out with your free hand, drop your weight on the opponent’s neck, and flex.
Shuck to arm triangle choke
This set up starts from sitting when your opponent is going for a collar tie. Before you go for the shuck, put your foot between your opponent’s legs to get a butterfly hook.
One the same side of your opponent’s clinch arm, reach over and grab your opponent’s tricep. Your other hand is clenching your opponent’s head.
Now with your grips set, you have to do three movements at the same time. Fall back as you use your hook to stretch your opponent as you shuck their arm with your tricep grip.
Be sure to fall to the side of your opponent and not bring them on top of you.
When you fall into this position your choke arm is already set around your opponent’s neck. Keep your head in tight and go right to your rear naked choke grip to finish the choke.
Kesa Gatame arm triangle choke
The traditional arm triangle choke in Judo is the Kata-Gatame that is done from Kesa Gatame side control. Kesa Gatame is when the side of your body is placed on your opponent’s chest with your leg kicked out. (Also having head control.)
This control is a little different, because your head isn’t on the mat for this choke. Grab your palm on palm grip and wrench your arm around your opponent’s neck.
It is very important to really wrench your arm to bring their neck off the mat as your biceps squish inward. Be sure to keep your head against your opponent’s trapped arm and drop your weight on their chest.
Generally this will be enough to finish your opponent, but if it doesn’t you have another option. If it doesn’t work, you can rotate your body to the mat and finish the arm triangle choke from there.
Arm triangle from guard
Normally this choke won’t work on a trained grappler, but it’s good to know for self defense. If for some reason you get tackled to the ground, immediately gain head control on your opponent.
Usually, they will look to place their forearm on your neck to crush your throat. First stretch your opponent away to take the pressure off your neck.
Next, wrap your arm around their neck, the same time you push their elbow across their body. From here, get a palm on palm grip, close your elbows, and finish the choke.
Tips for doing the arm triangle choke
To make your arm triangle choke perfect, you have to remember the crucial details. Here are some important tips for locking in this submission.
- Push the elbow: When you put your arm around your opponent’s neck, push their elbow to make their arm go over their neck. Doing this closes off the space in front of your opponent’s neck.
- Grips: The best grip to use for the arm triangle choke is usually a palm on palm Gable grip. Although depending on the situation and technique, an RNC grip will also work.
- Push in opponent’s shoulder: You need to drive your opponent’s shoulder into their neck. Doing this closes off space in front of their neck.
- Pull arms in: After securing your grips, pull your arms inwards to close off any extra space.
- Forehead on ground: Once you lock in your grips place your forehead right on the mat.
- Ear to ear: To close off any extra space, you should go ear to ear with your opponent.
- Sprawl out: After securing your grips, sprawl out and drop your hips to the mat next to your opponent’s hips.
- Shoulder Positioning: Be sure to drive your shoulder into the side of your opponent’s neck and not upward. This will ensure you place pressure on their carotid artery.
- Choke with body: As you drive downward to put on the pressure, be sure to squeeze with your whole body. Doing this will ensure that you get optimal pressure on your arm triangle choke.


